How-To Guide
How to Measure for Gym Wall Padding
November 13, 2019

Of all our products, wall padding is the one that requires the most careful measurements before manufacturing. If something like a cutout for an outlet is off by so much as a half inch, the outlet could be rendered useless. Let’s walk through how we would do that.
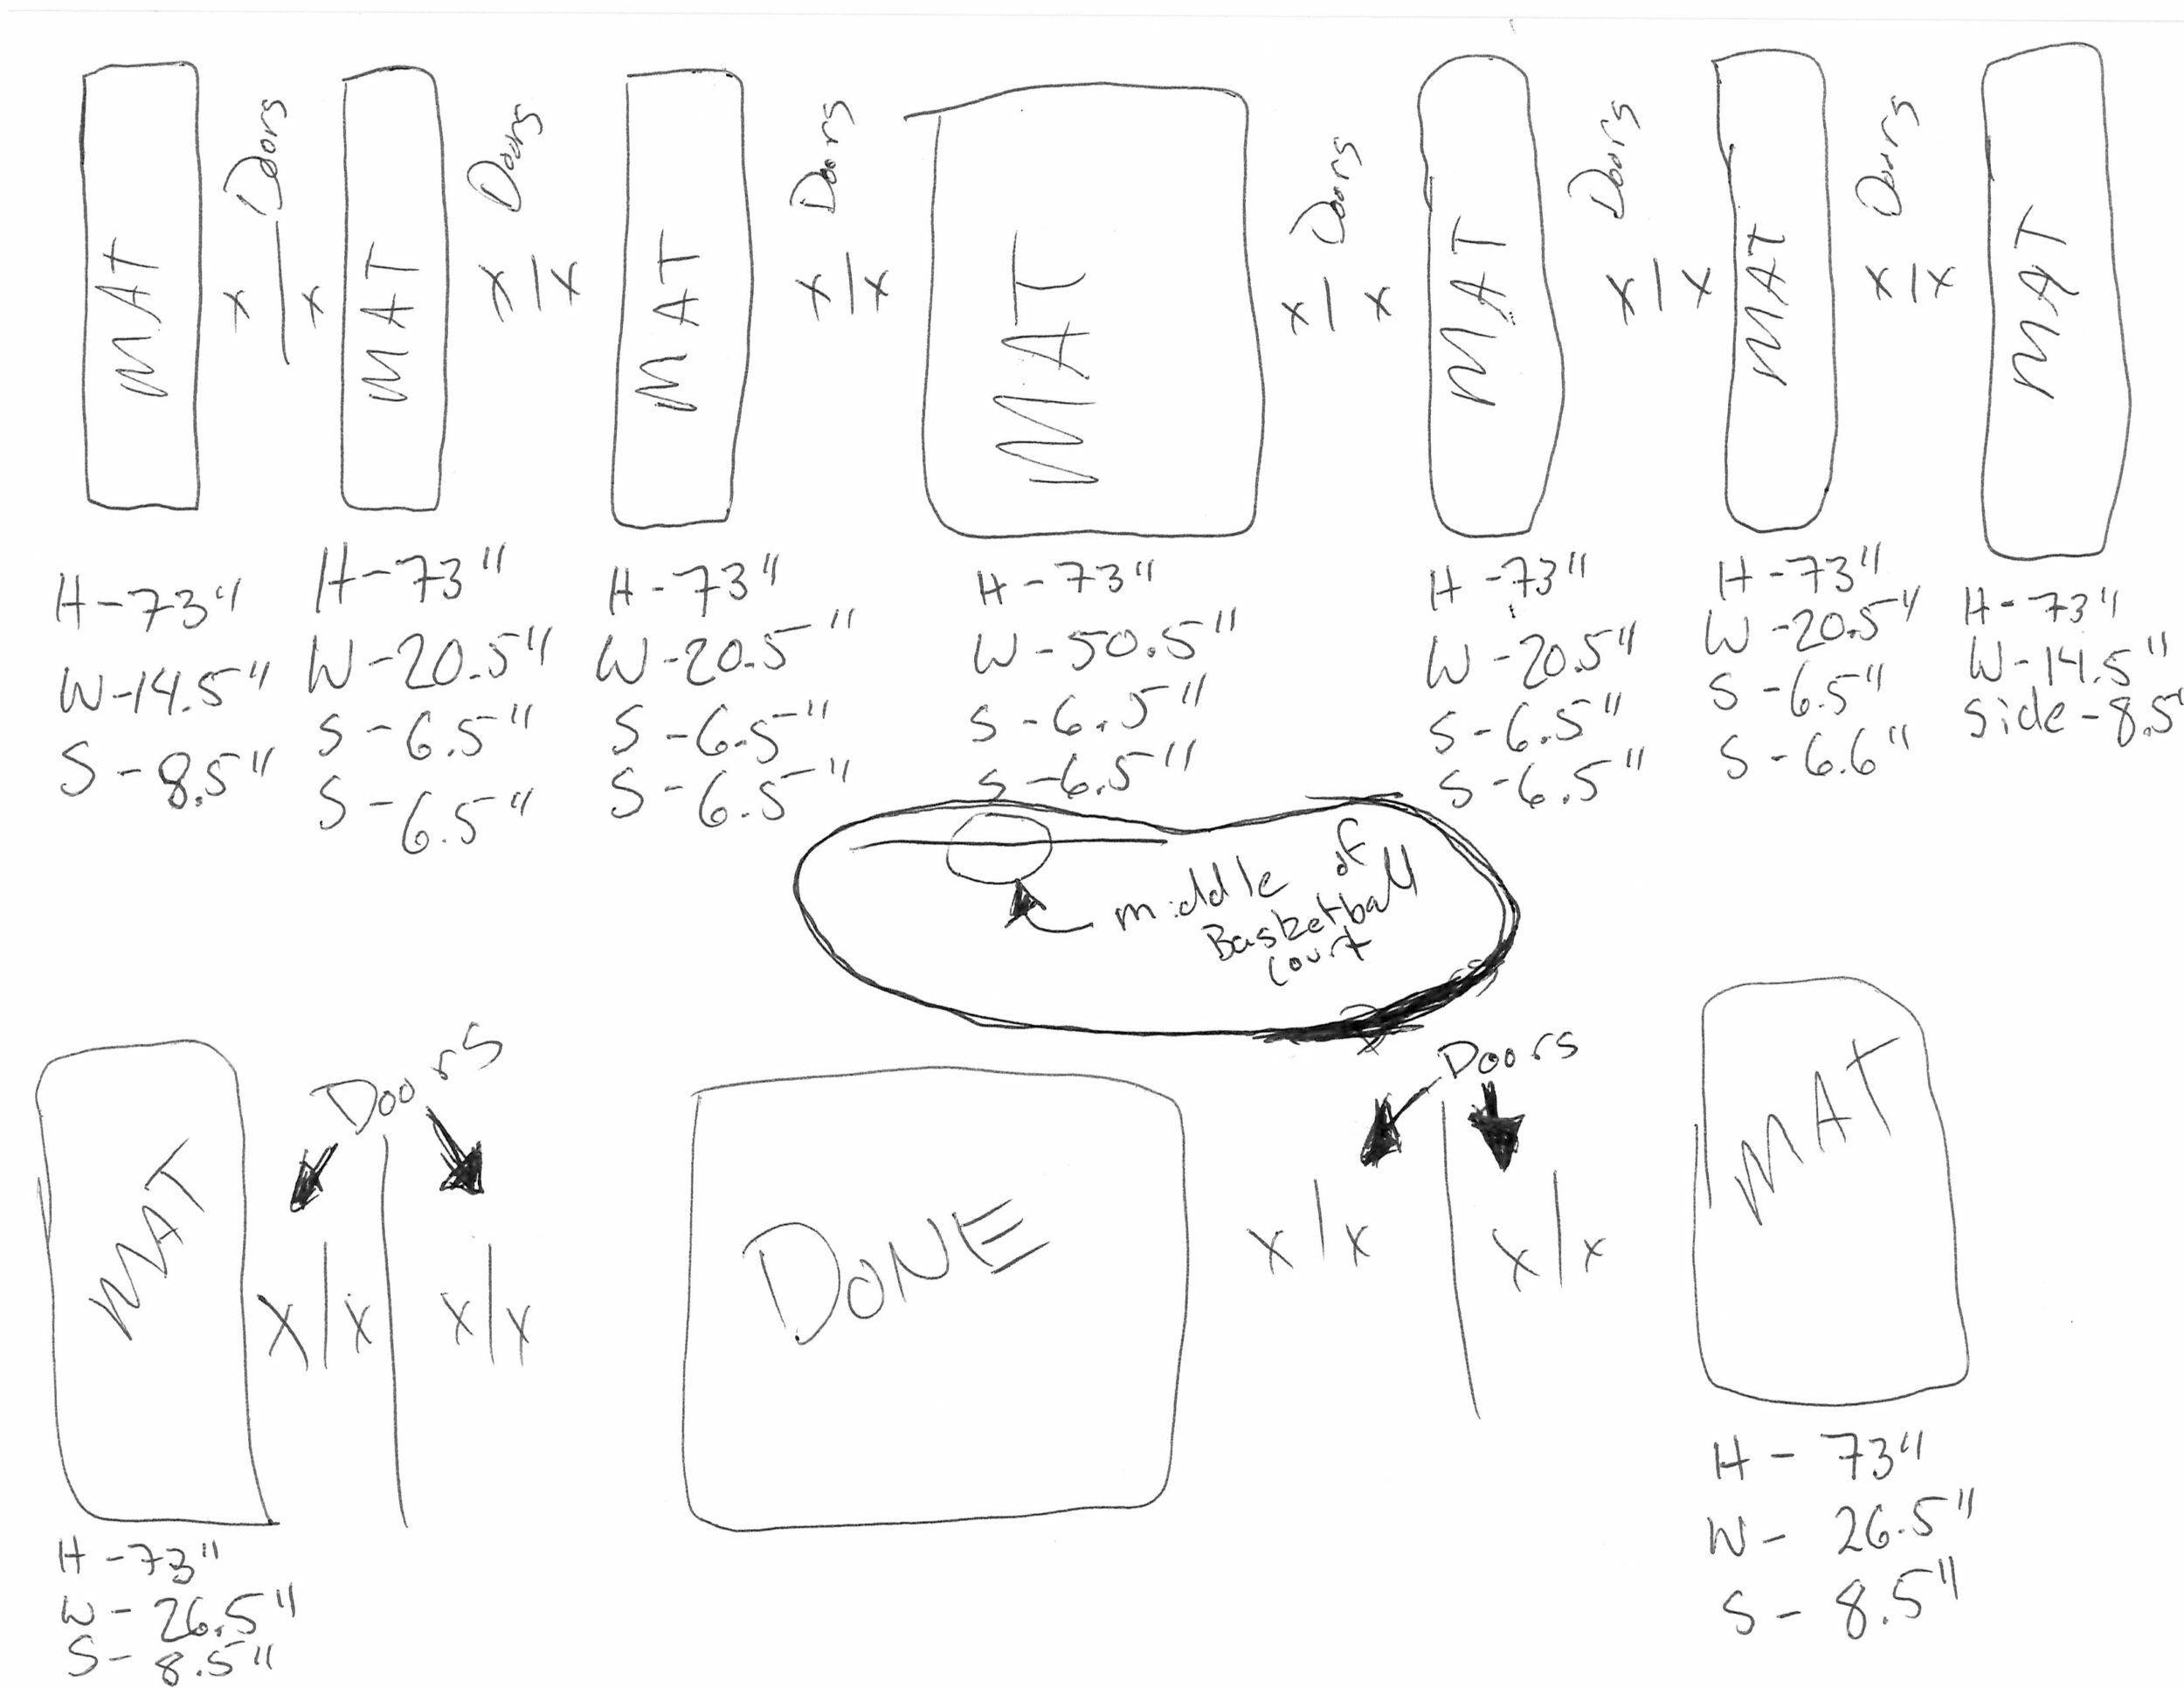
To get started, you’ll need a measuring tape, partner, a pencil, and blank paper. The best way to record all of the measurements we’ll be taking is on a sketch of the panels. No matter how bad you are at drawing, this will be a much more helpful way of organizing the measurements than any other method of description. Your sketches don’t have to be pretty (see example to the right)!
Pictures of the walls are also helpful, but not required. If you do take pictures, you can even print them out and write your measurements directly on them.
Pick a Starting Point to Measure From
First, you’ll need to decide how far up from the floor you’d like the padding to start. This is usually just above the baseboard, or 3 to 4 inches off the floor. Measurements for obstacles such as power outlets, fire alarms, and windows originate at this height, not at the level of the floor. You should also decide at this point how high you need your padding to be. Our standard heights are 5, 6, 7, and 8 feet, but we can also do a custom height of anything under 8 feet.
Next, pick a starting point on the extreme left or right of a wall. Notate where in the room this is on the sketch. This is the point from which all measurements for the first panel originate. From there, first measure the length of the wall section, from the starting point to the first obstacle or corner that will necessitate a full break in the padding.
Add Obstacles and Graphics to your Wall Padding Sketch
After recording that on a sketch of the panel, we’ll need to go back and measure for any obstacles to the padding that need to be accounted for. For each obstacle, you’ll need to measure from the starting point to the near side of the obstacle, from the near side to the far side, from the floor to the bottom, and from the bottom to the top. One important note is that you need to account not just for the size of the obstacle, but for the additional space required to use it, such as space for a electrical socket cover to be opened, or the handle on a fire alarm to be pulled down. Don’t make your fire alarms unusable by not allowing sufficient space for operation!
Also while measuring, you need to record the location and rough size of any graphics you would like to have printed onto each padding section. These can be recorded in the same way as an obstacle, but need to be very clearly marked on your sketch as a graphic, with notation of what graphic specifically is going to be printed there (see example to the right). If you have a file name already, that’s great, otherwise a detailed description is fine. Keep in mind that we can print on the full surface of the padding, including around obstacles — it doesn’t have to be limited to uninterrupted spaces! When you send over your sketch and descriptions, please also include any graphic or logo files you reference.
Move Panel by Panel Around the Room
After you’ve recorded all of the obstacles and graphics that need to be accounted for in this first panel, we’ll move on to the next panel, and on around the full room. Doors can be measured in the same way that any other panel is, except that careful height measurements are needed, as well as consideration of door operation. Since padding is 2.5 inches thick, the panel can interfere with door handles, opening, and closing if enough clearance isn’t allowed. Obstacles like door handles and windows should be notated for doors just like obstacles on other padding panels.
Measure Corners and Columns Carefully
As you proceed to measure around the full room, you’ll start to run into things like corners and columns. These need to be carefully notated in your sketch, and handled with special care. Whenever there is a corner or other change in padding direction, the thickness of the padding needs to be accounted for. The easiest way to do this is to simply tell us that you have NOT taken this into account in your sketch, and we can make the necessary adjustments to your measurements to avoid any overlapping issues.
If you would like to account for this yourself, you’ll need to subtract the thickness of the padding, 2.5 inches, from one side of each corner. Most importantly, you’ll have to remember that you’ve done this when you’re measuring for obstacles on that panel. Those obstacle measurements will also have to start 2.5 inches away from the corner. It’s easy to make a mistake this way, which is why we recommend simply measuring everything from the corners and letting us adjust your measurements to prevent overlap.
For columns, we’ll need measurements for both sides and the front. If a column isn’t straight up and down, we’ll need these measurements at the height of both the bottom and the top of the padding.
And that should be all you need to know to create accurate sketched schematics for great looking wall padding! If you do have any questions while you are measuring, the CoverSports sales team is happy to help — just give us a call at 800-445-6680.
CoverSports
5000 Paschall Avenue
Philadelphia, PA 19143, USA

